Contact

Monday, September 6, 2010

TLT - Terribly Late Tina


Is it Monday already?
Once again, I am late for posting this week's Baking Beauties challenge. It's never because I am late at completing the challenge... it's just that the weekends always speed by and the next thing I know, it's Monday morning and I am cursing that I now have to rush to complete the post.
As most people, I find mt mind is in a complete fog on Monday mornings, so please excuse any randomness in this post.

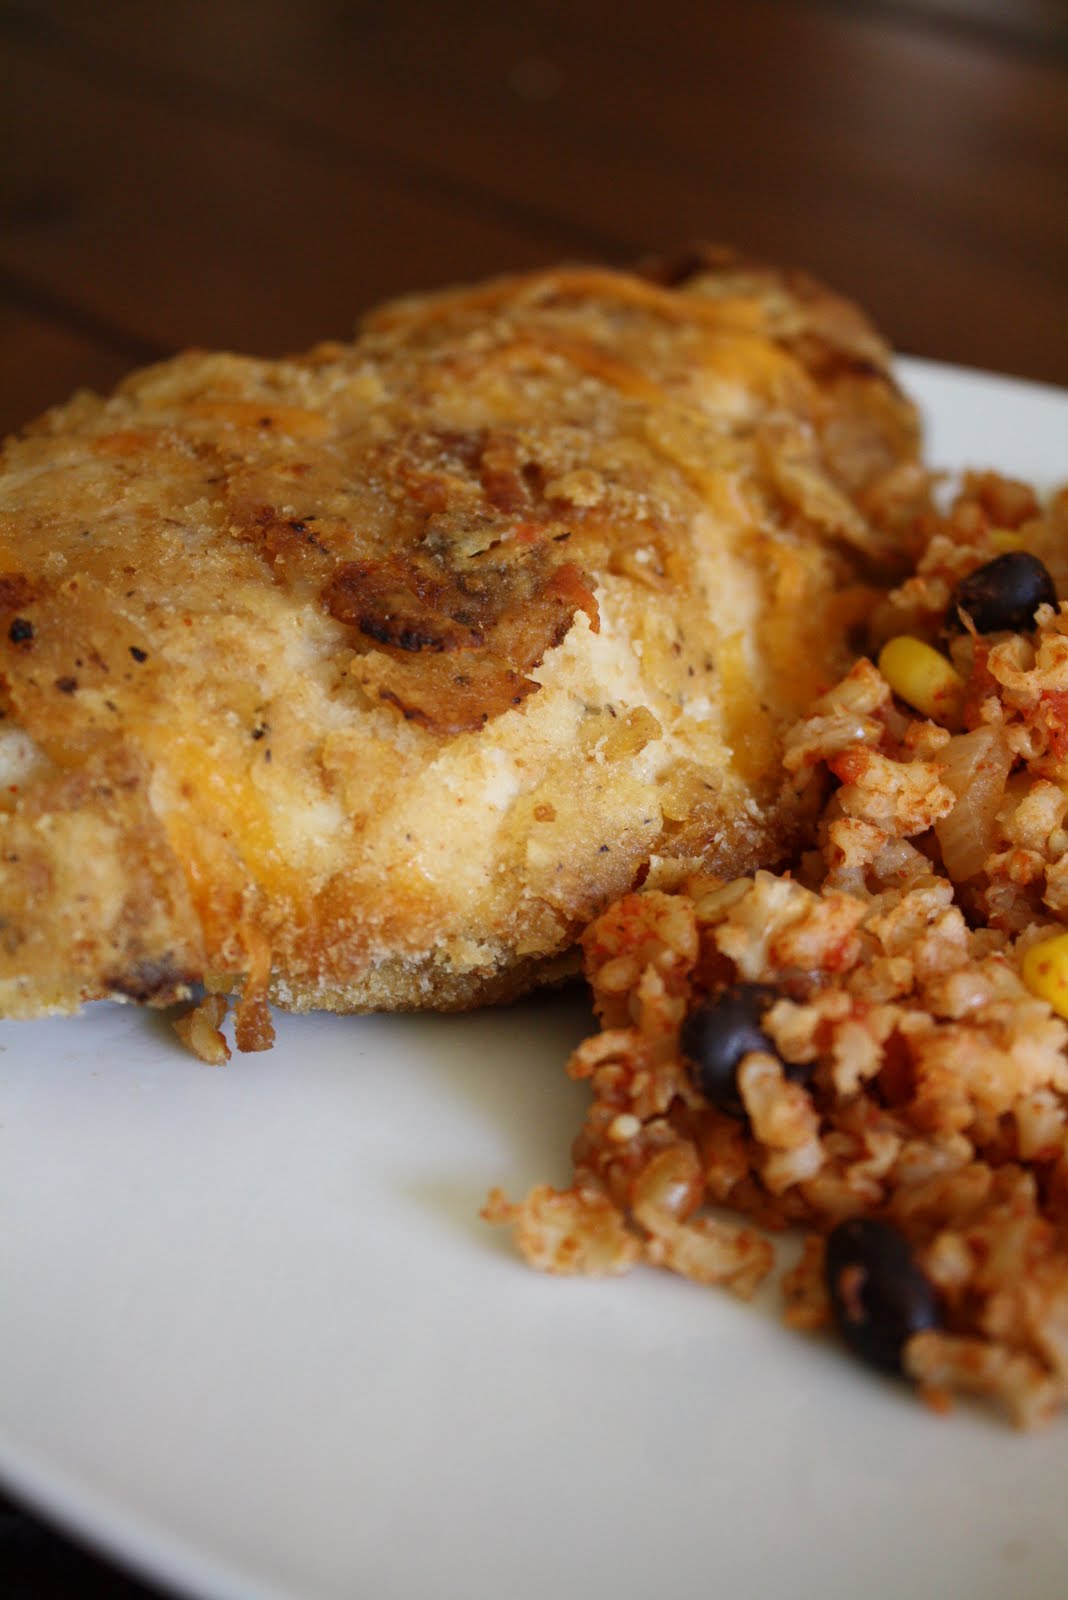
Okay, back to the good stuff. The TLT (Larry T) Salad. During the summer, when the weather is smok'n and our family is trying to survive in our home (that does not include air conditioning), the thought of turning on the stove or the oven just disgusts me. We often eat a "Big Salad" (a la Seinfeld) for dinner. It's healthy, it's filling and it keeps us cool.

This salad was exactly that. I might be lying a little, since I did have to use the oven to bake the croutons and bacon. But, the croutons were easily prepared the evening before (when the house got down to a respectable temperature).


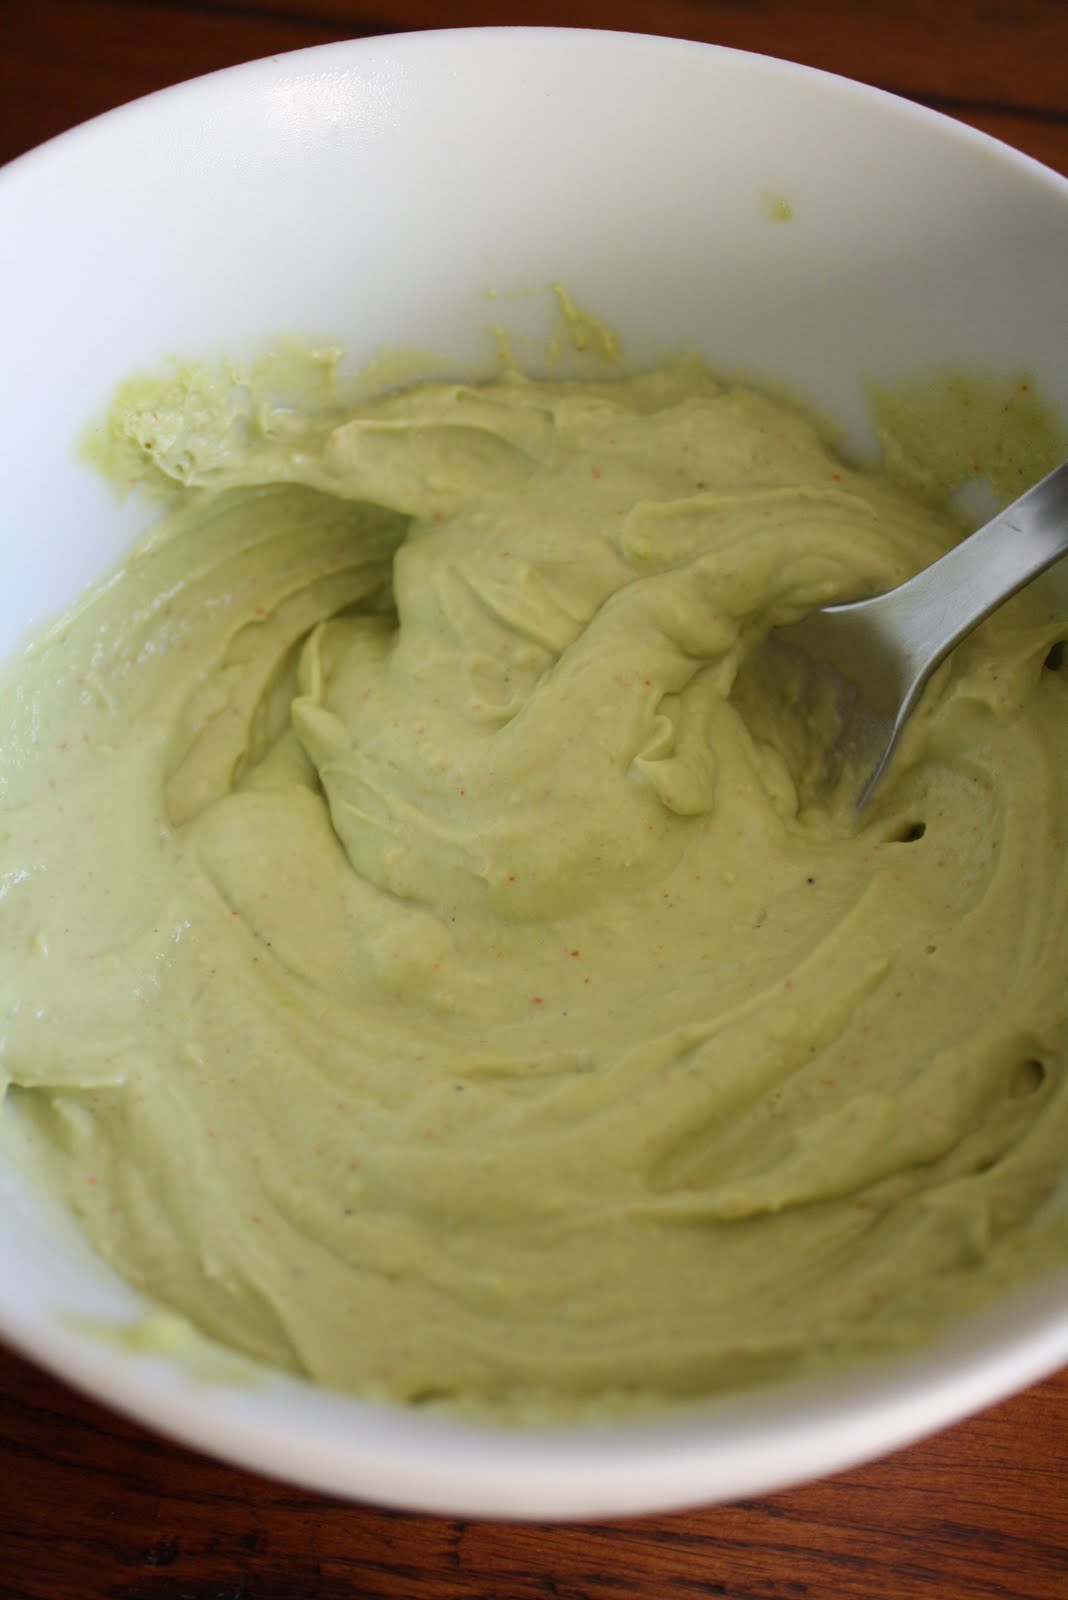
I absolutely loved the dressing for this salad. I used the tiny bit of basil that grew in my garden this summer (it caught a horrible disease that left most of the leaves discoloured and inedible) in the dressing. It was so fresh and tart and just what I like in my vinaigrette.

The entire salad was a hit. In fact, this was the third time making it since we bought Bite Me. It definitely won't be the last either.

Monday, August 23, 2010

Falafels, how I love thee...


I really do. I could eat them everyday. Except that wouldn't be the healthiest thing to do. That's why I enjoyed this week's Baking Beauties recipe. These falafels, in a larger burger patty size, are baked, not fried.

When I was in high school and a rebellious vegetarian teenager, one of the first recipes I tried to make was a chickpea burger. I don't remember if it went over well with my "meat and potato" parents, but it was a hit with me. Even though the Bite Me recipe was much different, it was nonetheless delicious.

Now, I didn't follow the recipe to the "T." To the falafel mixture, I added a dash of cinnamon and straight up bread crumbs until I reached my desired texture. As well, I didn't bother cooking the onions first before running the ingredients through the food processor. I thought, if I'm grinding everything up, what's the point. It's not like you're going to bite on a hunk of raw onion. Oh yeah, I added some fresh cilantro as well.

With the tahini sauce, I didn't add the mint and parsley. I just didn't think it needed it. We just folded our pitas over the falafels, to form a sort of sandwich. We topped our falafels with the yummy tahini sauce and some shredded cabbage.

I will definitely make this again. Like I said, I love falafels. But, I never appreciated smelling like a fry house after making them. The Falafel Burger is a healthier and less smelly alternative to the authentic fair.

Sunday, August 15, 2010

Guilt Free Pop Tarts


Now, it's not what you are thinking. They're still full of sugar and fat, but I can guarantee that you will be able to pronounce every ingredient used. I can't say the same for the commercial ones of our childhood. That's why you can have a guilt free conscience serving these tasty treats to your children for a weekend brunch.

I decided to make these for just that occasion - a Sunday brunch with some very good friends. I thought the kiddies would love to eat these plum and strawberry preserve pop tarts while the grown-ups feasted on eggs, bacon, french toast and fruit. Well, the pop tarts were enjoyed, but by the grown ups and not the kids. I can't say that the kids didn't like them because we finished them off before they even had a chance to try them.

The recipe is a basic butter pastry that encompasses a fruit preserve. You can use any filling you want, but since Ontario strawberries were in full force, I wanted to take advantage. I just adore plums as well and find that the tartness really balanced out the flavour.


Pop Tarts
(as adapted from epicurious.com)

Ingredients
2 cups plus 2 tablespoons all purpose flour plus additional for shaping and rolling
1 teaspoon coarse kosher salt
1 teaspoon sugar
1 cup (2 sticks) chilled unsalted butter, cut into 1/2-inch cubes
4 tablespoons ice water
12 tablespoons fruit preserves
Powdered sugar

Preparation
Whisk 2 cups plus 2 tablespoons flour, coarse salt, and sugar in large bowl. Add butter. Using fingertips or back of fork, blend in butter until mixture resembles coarse meal. Add ice water by tablespoonfuls, tossing until moist clumps form. Gather dough into ball. Divide in half; shape each half into disk. Wrap in plastic. Chill at least 1 hour.

Line 2 large rimmed baking sheets with parchment. Working with 1 disk at a time, roll out dough on floured surface to about 13x11 inches. Trim to 12x10-inch rectangle, then cut into eight 5x3-inch rectangles.

Arrange 4 rectangles, spaced apart, on each sheet. Spoon 1 1/2 tablespoons preserves in row down center of each rectangle. Top preserves with second dough rectangle. Using fingertips, gently press all edges of each tart to seal; press all edges with tines of fork to double-seal. Using toothpick, poke a few holes in center of top dough rectangle. Cover; freeze tarts on sheets at least 2 hours and up to 1 week.

Position 1 rack in top third and 1 rack in bottom third of oven and preheat to 375°F. Bake frozen tarts uncovered until golden, reversing sheets after 15 minutes, 25 to 30 minutes total (some preserves may leak out). Immediately transfer tarts to rack. Sift powdered sugar lightly over.

Sunday, August 8, 2010

Tortilla Crusted Chicken with Avocado Dip


I am so excited about the new cookbook that we are working through for the Baking Beauties. Over the last year or so, sometimes I have found that it's hard to think of what to make for dinner. It's not that I can't come up with ideas - please, I am constantly thinking of food. But, with so much going on in our busy lives I find that far too often I realize it's 4pm and I haven't decided what it is I am making for dinner.
Pre-children, this wouldn't always be a huge issue. I would stop by the grocery store after work, start cooking when I got home and by 6pm when my hubby would step in the door, dinner would be on the table.
Now, it's pretty much game over after I pick up my toddler from daycare. Occasionally, both children throw me a bone by napping (Elliott) and playing independently (Avery). But, as I just said, this is not normally the case.
So, going back to my first thought, what makes "Bite Me" so wonderful is that each recipe is straightforward, easy and an all-around crowd pleaser. Or so it seems. A few of us have skipped ahead and tested out some recipes - all were hits.
The Tortilla Chicken on page 141 is certainly no exception. Definitely not for the faint of heart, this tortilla and cheese breaded chicken breast is something heavier than we normally eat. But, maybe that's why I enjoyed it so much. Really, how much boneless, skinless, tasteless chicken breast can one family eat?


The real winner from this recipe is the avocado dip. So smooth and creamy and delightful. I almost wanted to throw the extra into my ice cream maker to see what the outcome would be. Unfortunately (or perhaps fortunately) we finished off the dip before I could test it out. I used the extra dip as a spread on some veggie sandwiches and a southwest inspired burger. Yumelish!
Anyways - if you don't have this cookbook yet, what are you waiting for! It might be the one time I can actually get away with telling someone to "Bite Me"

Monday, July 26, 2010

Baking Beautiful Brioche!


This past Baking Beauties assignment was for us to try our hand at making brioche. I just adore fresh baked bread, so I couldn't wait to complete this recipe.

One recipe from "Baking with Julia" can make three loaves of brioche, so you get quite a bit from not too much work. I don't have proper brioche flute pans, so I decided to make some loaves with my dough. I sectioned off the dough into three - using two thirds for two loaves and the last third to make dulce de leche cream cheese brioche buns.

The dough was quite easy to put together (simpler than other recipes I have tried). However, if I didn't have a stand mixer, I wouldn't be saying brioche is easy; my Kitchen Aid handles the tough part - kneading for 15 minutes. My mixer was so hot, I swear it was about 2 minutes away from smoking!


From that point, there's not much left to do. A few steps of waiting for the wonderfully buttery and tender dough to rise and voila, c'est tout! I can not even tell you how delicious the main floor of our house smelled while it was baking. Like heaven.

To make the dulce de leche cream cheese buns, you take the dough after the first two hour rise and roll it out into a rectangle. Layer cream cheese and dulce de leche over the dough (leaving an inch border all around). Roll it up and slice it. Place slices into paper lined muffin tins. Leave to rise in the fridge over night. In the morning, you must let it rise again for 2 hours before you bake until golden. It's a nice change from your regular run of the mill sticky buns.


As for the brioche loaves, I served them with some berry preserves, but it was so good, I had many slices au naturel. I hope all the Beauties tested this recipe out. It was easy and the results were fantastic. I will definitely be revisiting this recipe when I feel the urge for some brioche!


P.S. Brioche is best eaten the day it's baked. However, if you can't finish it, day old brioche makes an excellent french toast!

Tuesday, July 13, 2010

Rhubarb Upside Down


So I finally completed the Baking Beauties challenge from Baking with Julia - The Upside-down Cake. I decided to make Baby Rhubarb Upside-down Cakes... a perfect treat to bring to my parent's for lunch.

I have hordes of fresh rhubarb growing in my backyard, so I need to use it any chance I get. I never realized how quickly rhubarb grows. I guess I always assumed you harvest it once, and it's gone. Not so. I have given away bundles and bundles of the stuff and more just keeps cropping up. Don't get me wrong, I am not complaining - I love the stuff. It just seems never-ending. Anyways, having fresh rhubarb for this recipe was wonderful.

I don't have proper "baby cake" tins, so I used my muffin tin instead. I guess I had a bit too much batter, and the cake part overflowed a wee bit. Thankfully it didn't spill onto the bottom of the oven, resulting in a stinky, smokey kitchen.


The recipe states to turn out the cakes as soon as they come out of the oven because the caramel cause them to get stuck. However, I think I should have waited a minute or two as I found part of the rhubarb topping stayed behind with part of the cake.

I served the little cakes with some whipped cream and, of course, coffee. They were a hit! A delicious buttery cake that's not too sweet - balanced out by the tart rhubarb. A perfect summer treat!

Sunday, July 11, 2010

One Big Cupcake for a Big Boy One!


That doesn't really make sense, does it? Well, what I am getting at is my darling little nephew, Oliver, turned one today. And in celebration of this big milestone, I made him a giant cupcake birthday cake.
Since he doesn't talk yet, his mom and I were allowed to decide the theme for his birthday (what do one year olds know anyways!). We thought someone as sweet as Oliver deserved an equally sweet and adorable cake.

The cake is a simple white butter cake, filled with a fresh peach puree and peach mousseline buttercream. I decorated the cake with simple rolled fondant (the white chocolate kind, as I find it has a slightly better taste than the plain stuff).

My sister gave me complete carte blanche on what flavour of cake to make. Being that the last week or so has been a heat wave here in T.O., I was inspired to do something light and fresh. I made a wonderful peach puree by blending some market fresh peaches, reducing it by half, and adding a little almond and vanilla extract. At one point, I let Avery try some and he insisted on having more (and more and more). I got a bit nervous that he might eat all of it. I don't remember him being that fond of peach puree when he was a baby!

Michele and I had met up earlier in the week to make cupcake shaped monogrammed cookies as favours for the party. Well, really I should say that I hid in the kitchen decorating while Michele was stuck entertaining our two little ones. If you asked, I am sure each of us would say we got the better deal. We used a blue and green motif. Each cookie was placed in a cellophane bag, tied with red and white twine. This is what I used as inspiration for the colour scheme of the cake.

I used blue fondant as the "paper cup" portion of the cake, brown fondant for the "cake" and white fondant for the "icing." The whole thing was topped with a cherry and sprinkles made of (you guessed it) fondant.


I don't know how impressed Olie was, but I can say all the older children were fighting over who got the cherry. Jerry decided that it was best to have all the children share the prized decoration.

Happy Birthday little Oliver. I can't believe a year has gone by already. You are as adorable and pleasant as the day you were born, and we can't wait to watch you grow even more!

Oh, and PS, with the busyness of this weekend, I didn't manage to complete our Baking Beauties challenge. I will do this tomorrow and post after I am finished... promise ;)